Add 3D in Google Earth
The latest updates to Google Earth focus on providing more technical tools for urban planners, surveyors, architects, and territorial analysis.
The big new feature, with no need to subscribe to the Pro plan, is the possibility to upload and insert 3D models in Google Earth — and very easily! We can even share the project.
Previously, to place a 3D model, you had to use the desktop version Google Earth Pro, or work with SketchUp, Blender, AutoCAD / Revit blocks, plus plugins and strange files. Now, you only need to import a model or building in GLB, and that’s it.
How to place a 3D building in Google Earth
For now, the initial supported format is GLB (It is the standard for models in modern web projects or 3D viewers) to place a 3D in Google Earth. It allows you to position, scale, and rotate the model on the globe. Steps:
1. Prepare the model and export the .glb file
The 3D model must be inserted as a .glb file. The good news is that there are hundreds of platforms for exporting 3D drawings, or you can use the usual technical programs (Blender, SketchUp, 3ds Max, Revit, etc.). Export recommendations:
- Use a realistic scale (Inside Google Earth, the dimension can be scaled)
- Clean up unnecessary geometry
- Reduce the model size if it is very large
- Avoid overly complex materials.
🟧 Note: Embed the textures inside the GLB, because referenced textures and GLB animations may not work correctly.
2.- Access Google Earth
We are only going to work with the online version of Google Earth, which you can access from HERE. Inside, in the upper right corner, you will find “Launch Earth” with your Google account, and then click on New.
3.- Insert 3D in Google Earth
Once the Google Earth map panel is open, to upload the 3D file go to Menu > Add > 3D Model — that simple! (It can be imported from Google Drive or uploaded as a file)
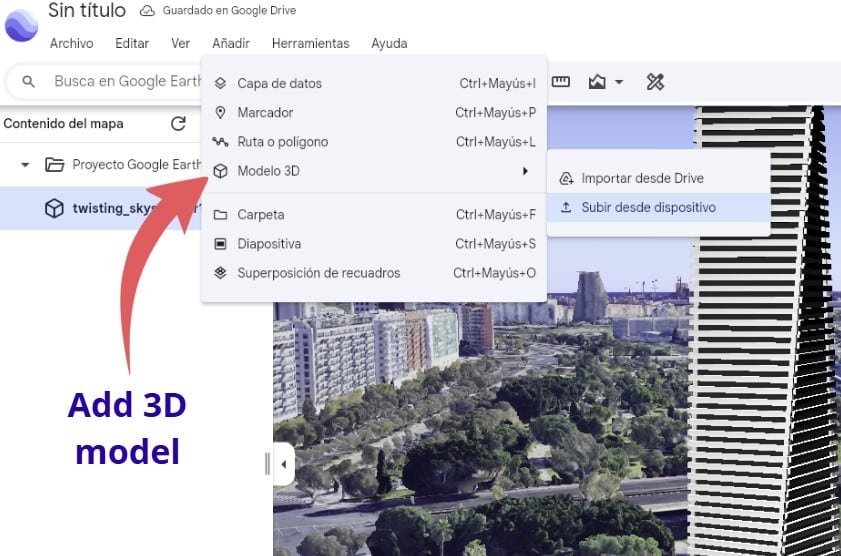
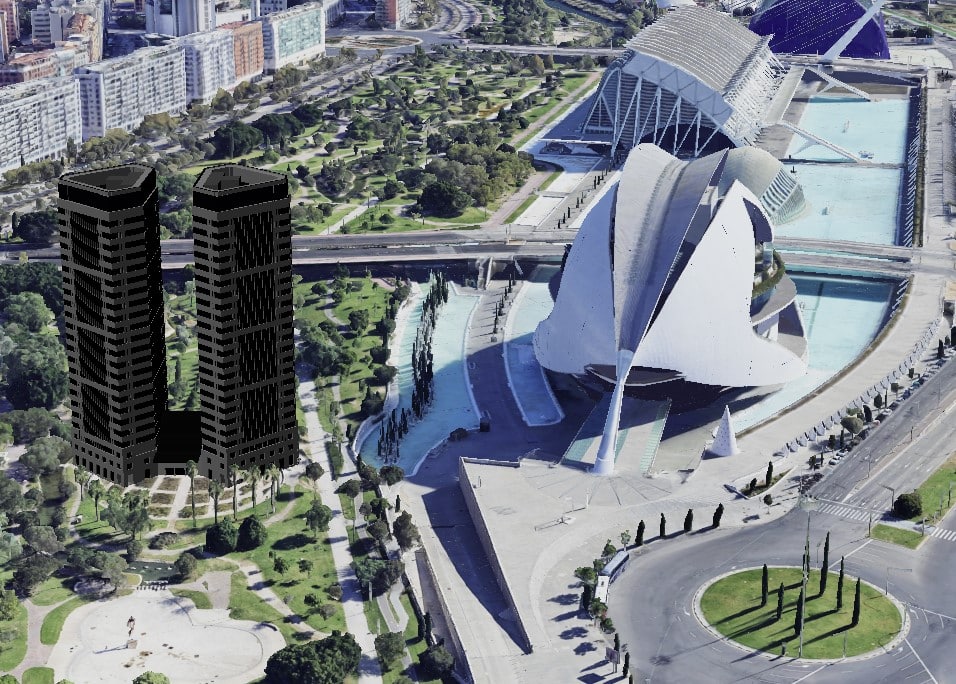
Once the .glb file is loaded, you will see it on the map — now it’s time to position it, rotate it, and scale it if necessary!
If you cannot see the model you imported, it is probably because of its scale: either too small or too large. It can be scaled in the settings.
🟧 Note: I recommend that before uploading the 3D file, you first locate the map in the area where the model will be inserted and use a plan view. If the project that
4.- Adjust the inserted 3D
Once the 3D model has been imported. To activate the 3D object features, you will see the file name and three small dots in the right sidebar, which activate the settings. You will have the following options:
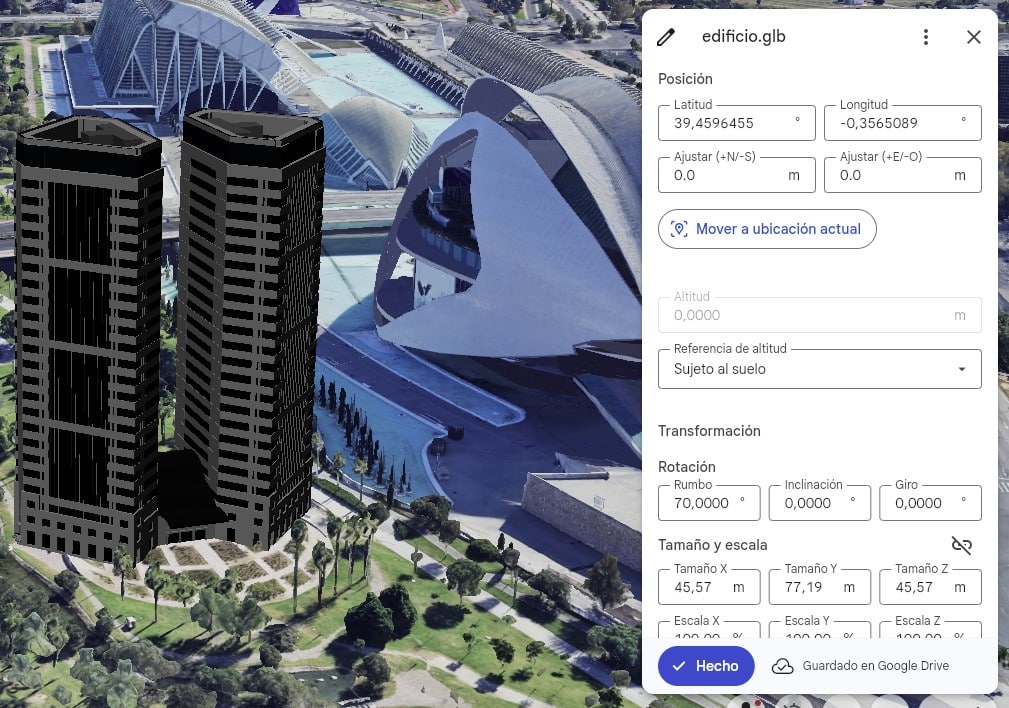
- Position: You can change the latitude and longitude, or move the 3D by dragging it with the mouse.
- Height: This is the “Altitude Reference” section so it rests correctly on the terrain — there are plenty of options!
- Rotation: to orient the façade or align it with the street/plot.
- Size and scale: so that the building has the correct size by calculations on the x, y, and z scale.
- Advanced settings: This is the “Camera View” in case you want a specific position.
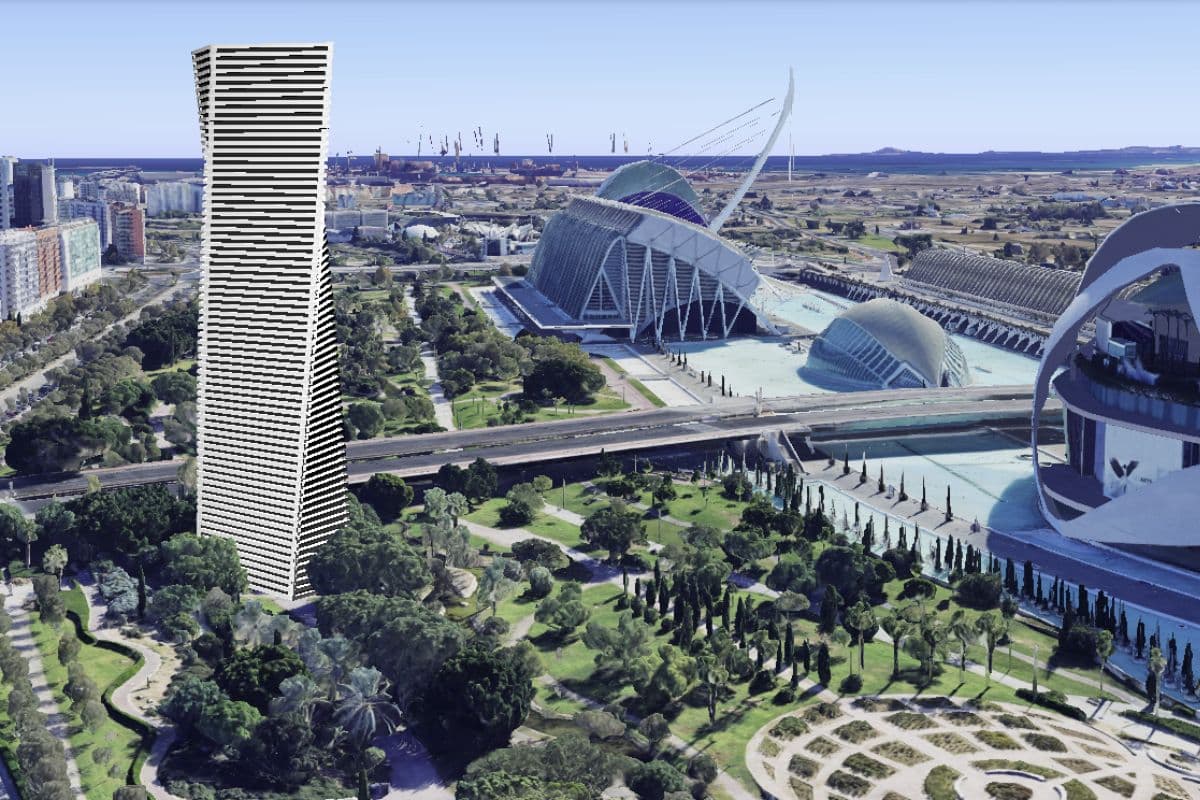
The advantage is that the building is seen in its real context: terrain, streets, nearby buildings, topography, and satellite imagery.
The 3D model remains inside the Google Earth project. Keep in mind that imported models consume Google Earth storage quota, and each model upload counts as a separate element.
From here, you can create tours, presentations with Google Earth, share with other users, and if you have the Pro version — well, many more things!
Other Google Earth updates
There are more interesting updates for terrain analysis, but only for Pro version users. You can add elevation profiles, more detailed location, contour lines, cut and fill, etc.
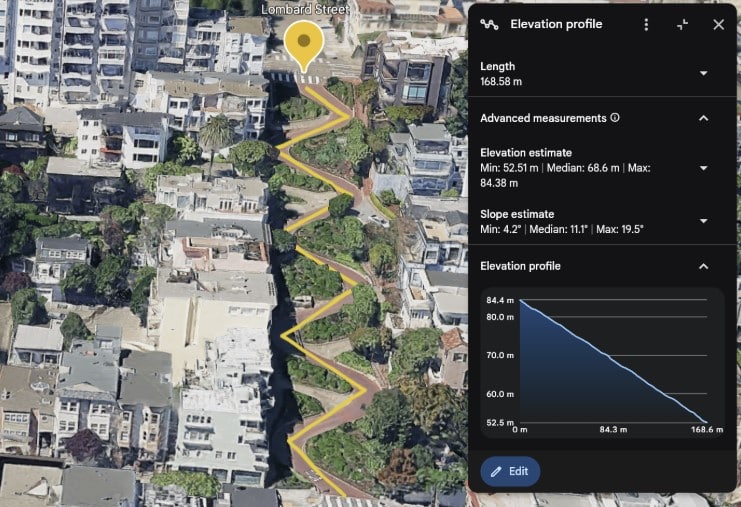
When drawing a line or route with the measuring tool, an elevation graph can be viewed in the inspection panel
It is useful for analyzing slopes, elevation differences, sunlight and 3D shadow analysis, routes, accessibility, logistics, transport, or construction planning, reducing the need to switch between several external tools.
Frequently Asked Questions – FAQ
How to insert a 3D model into Google Earth Web?
Open the web version of Google Earth and create a new project. Go to the side menu, select add element, and choose the three-dimensional model option to upload your file.
What file format is needed to upload a 3D object to Google Earth?
The online version of Google Earth exclusively accepts the structured GLB format. This file unifies geometry and materials into a single, lightweight container suitable for browsers.
What is the difference between inserting a 3D model in Google Earth Pro and the web version?
The classic desktop version of Google Earth primarily uses KMZ or DAE files through heavy plugins. The modern web version simplifies the workflow by allowing the direct import of standardized GLB files thanks to WebGL technology.
How to fix scale issues when importing a GLB file into Google Earth?
If the model appears oversized or invisible, access the advanced settings in the right panel by clicking the three dots. There, you can numerically modify the scale across the three spatial axes to adapt it to the environment.
Is it possible to import custom textures with the 3D model to Google Earth?
Yes, but you must embed the textures within the same binary GLB file during export in your design software. References to external paths will not be read by the server.
How can a model inserted into the Google Earth map be rotated or oriented?
Select the object in the project bar and open its advanced configuration menu. Use the slider or the numerical value of the rotation parameter to perfectly align the facade with the street.
Where are imported 3D models stored in Google Earth?
The files are stored directly linked to your Google Drive account or within the memory allocated to your cloud projects on the platform. Each independent upload consumes part of your available quota.
How to share a Google Earth project that includes a 3D model?
Once the three-dimensional model is positioned within your control panel, click on the share project button. The system will generate a public link that you can send to any user for exploration.