Integrate 3D architectural renders into real environments with AI
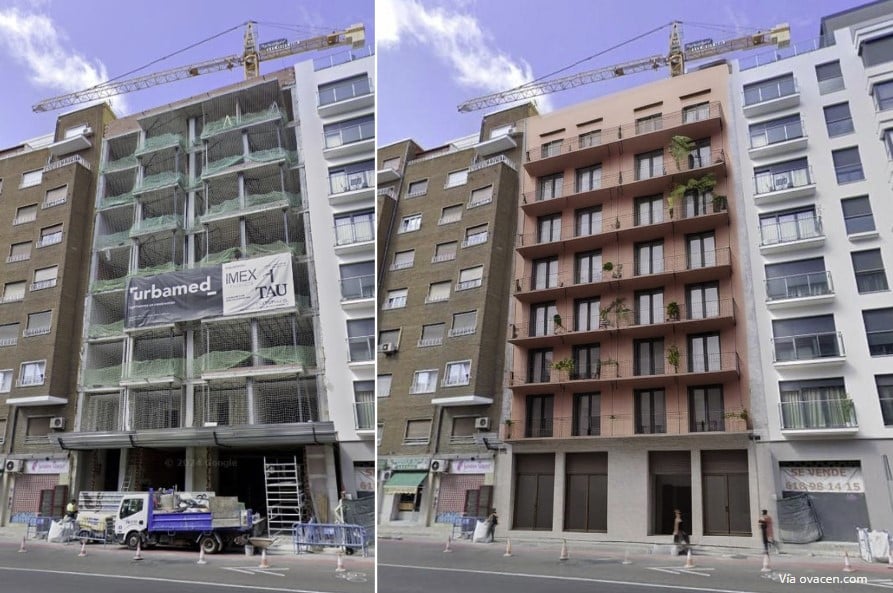
When presenting an architectural project to a client, buyer, or real estate agency, we usually offer a 3D render of the building integrated into its urban environment, whether before starting the construction or during its development.
At this point, inserting the building’s facade into the street where it is located, making it look good and realistic, is not easy at all! Not to mention the time spent on the assembly… Is there a quick solution?
Well, directly yes, and of course, it is with artificial intelligence through the Rendair program. An AI architectural rendering software specialized in photorealistic visualizations of projects.

Among the program’s options, with a few simple steps, you can recreate the facade with AI or insert your own render into any urban environment, and the integration is great!
For example, capturing a three-dimensional image from Google Maps and inserting the facade of our project is a unique feature we haven’t seen in other AI architecture programs.
Impress your clients with realistic infographics in record time with artificial intelligence
So… How do we do it?
1.- Obtain return photograph. We need to obtain an image of the environment where our project is or will be located. Three ways:
- We take a photograph of the environment ourselves.
- From Google Maps by clicking HERE we obtain the street-level environment.
- From Google Earth by clicking HERE we obtain the street environment but in 3D aerial view.
2.- Register in the rendering software. We have to register in the Rendair tool from HERE. NOTE! It allows us to register and see how the program works internally, but to perform a render, you need to subscribe ($19).
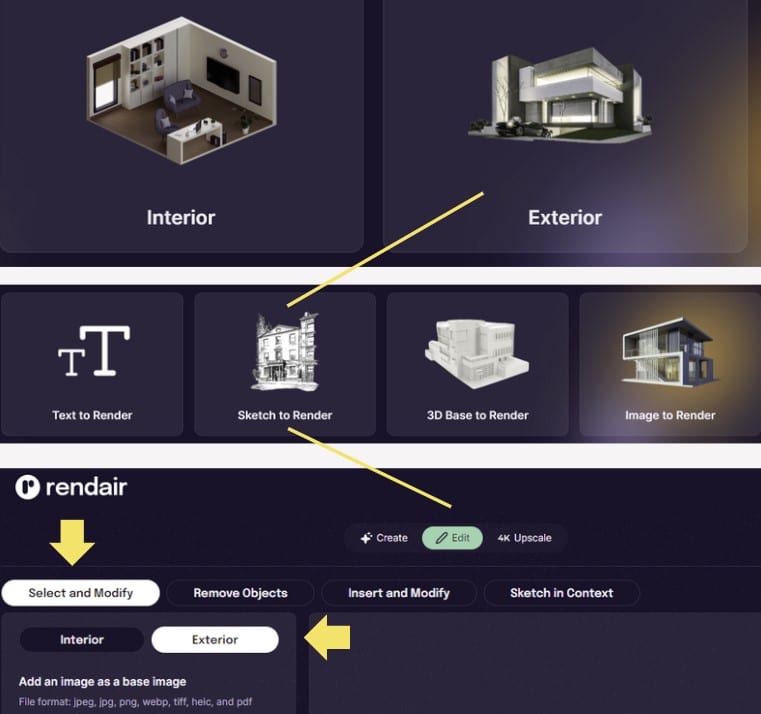
3.- Access facade rendering tool. As soon as we enter the tool, we have two options; interior or exterior rendering. We have to click on Exterior > Sketch to Render > and option “Edit”.

Then, we mainly play with two general options for rendering:
- Select and Modify Option: It consists of uploading an image of the environment, selecting from it what we want to change (e.g., only the building facade), and incorporating the image of our project as a style reference.
- Insert and Modify Option: It consists of uploading an image of the environment, and on this – without selecting anything – we incorporate the image of our project adjusting it manually.
4.- Upload photographs and options. When uploading the image of the scene, we have to highlight the area – facade that will be covered with the new infographic. There are multiple options, and we show them in the following image:

The rendering will be based both on the assigned options and the style reference image, which can be a realistic photo, a render of our project, or a simple sketch.
5.- Facade rendering. With all the tests we have conducted, we should consider the following points:

- The image of the environment cannot be too close to the facade; a certain distance is needed.
- Better results are obtained the more frontal the scene image is.
The tool has the option to erase elements that may disturb using artificial intelligence
- The “Maintain References” section must be active. The values of “Color Strength” and “Shapes Strength” are better at zero.
- The scene description is better if it is basic. Example… “Building facade, ground floor plus 7 floors, each floor in height has 4 identical balconies”
- The “Creativity” section should be at zero to reflect the reference image with maximum precision.
- In the “Image Strength” section, move it to 100%.
For those who want to try the tool, we advise you to “play” with the different options of the architectural software.
It is interesting to try using a base style image with a simple facade sketch or not using any reference, and adding a detailed description – prompt. For example, the following video where a single-family home is inserted over a Google Earth geolocation:
Additionally, Rendair offers other functions that facilitate the architectural rendering process, including:
- 3D model loading: You can load 3D models into Rendair from a variety of formats, including OBJ, FBX, and DWG to create infographics.
- Fast and high-quality rendering: It uses state-of-the-art cloud rendering technology to create photorealistic visualizations of your models in minutes.
- Realistic lighting and materials: You can customize the lighting and materials of a scene to create a realistic and attractive look.
- Camera and perspective options: You can adjust the camera and perspective to capture the perfect view of a model.
- Editing and annotations: You can edit and annotate your visualizations directly in Rendair.
- Real-time collaboration: You can share your visualizations with other team members and collaborate on them in real-time.
- 360º environments: Create renderings with 360% visualizations by joining several images.
Is it worth subscribing to the tool? In our opinion, it depends on the needs of the architecture studio. If you want quick work where the detail is not perfect, it is a suitable and economically viable option. Additionally, you can use the other options.
If you seek perfection and want your project’s facade to appear identically in the final infographic, for now, and with the tests we have conducted, it is not viable.
If you liked the article, share it!
